Get Your Classroom Paperwork Organized!
July 7, 2015
That’s such a nice, soothing graphic, right? With the jar of sharpened pencils and the pretty mint-green teacup and the neat handwriting font. We can’t see inside the little spiral notebook, but it’s probably full of orderly to-do lists with every single item checked off.
If this looks like your desk (or reminds you of your classroom), you can stop reading this post because you’re amazing and your mint-green tea kettle is probably whistling. If you’re drowning in so much paper that you haven’t glimpsed the top of your desk since 2013, we’ve got some helpful hints from organization expert Cindy Golden, author of The Special Educator’s Toolkit.
Here are some of Cindy’s best tips on organizing three key types of teacher paperwork: lesson plans, student work, and student information. Check these out, and share your own organization tips in the comments below!
Lesson plans
To organize lesson plans, Golden suggests creating a big lesson plan notebook. Get a large-size three-ring binder with index dividers for the different sections and plastic sleeves to hold permanent documents you won’t have to change. (If your school administrator requires that you use a particular kind of lesson plan book, you can still put this in your binder so all your information stays together.)
With this three-ring binder, you can create a customized lesson plan book that meets the specific needs of your classroom. It should contain everything related to planning for your academic day, including a classroom schedule, schoolwide activity calendar, weekly group lesson plans, individual student plans, and support services schedules. For easy reference, create a title page like this one for the front or back cover of your binder that lists all the contents:

Student work
Student papers, grade books, and work samples can quickly add up to a paperwork headache.
Golden recommends investing in these simple organization tools:
- Plastic dishpans. Put them on a bookcase to hold finished work for each period or subject. They work well because they easily fit regular-sized pieces of paper without bending them.
- Folders in file boxes. Try putting these out on your bookshelf as well. As your students finish papers, they can file them in their own folder so you can grade them at the end of the day or during planning time.
- Plastic pockets. These can be hung on the wall to store completed student work. If your class is small, you can hang a separate pocket for each child.
- Hanging nylon file pocket holders. Readily available in school supply catalogs, these holders are a good way to hang folders where students can easily reach them.
- File crates. Fill the crate with hanging folders for all the different school periods or subject areas. As children complete assignments, they’re in charge of filing their own work in the folder. This creates a convenient portable system for you!
- File folders labeled with a To Do side and a Finished side. Have one of these for each student. As students complete papers in the To Do side, they place their completed work in the Finished side. Color code the folders for easy student access and have kids place them in a predetermined location for you to grade.
Student information
To keep student information easily accessible, portable, and confidential, Golden recommends a three-ring binder system. She outlines two different options:
1. Create one master Classroom Information binder to include all of your students. This is the most user-friendly and most portable, as you can take it on field trips, emergency drills, and so forth. Your binder should hold
- School contacts: phone numbers and names of staff members back at the school
- Roster of students
- Addresses
- Phone numbers
- Photo of each child
- All types of permission slips
- Medical information
- Emergency card information
2. Create individual binder notebooks that contain detailed information on each student, including:
- Student photo
- Permission slips
- Medical information
- Address
- Phone numbers
- Emergency card information
- Bus information
- Copy of the current IEP or summary sheet with goals and objectives
- Copy of the current eligibility
- Copy of the current psychological assessment
- Copy of the current behavior intervention plan or treatment plan
(Remember to keep these in a locked file cabinet to protect confidentiality.)
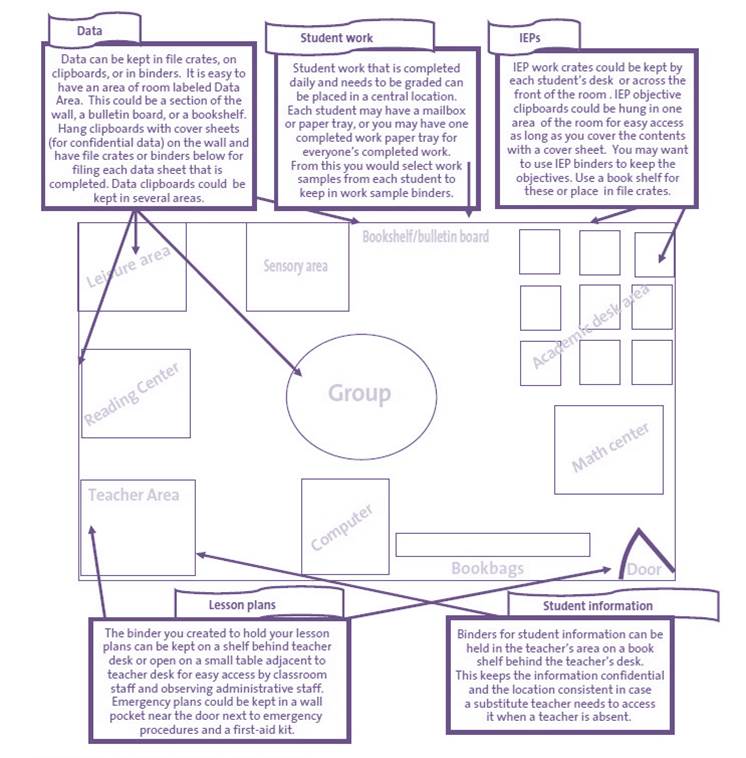
Location, location
So where should your paperwork organization system be located? Here’s an example of how to integrate an organizational system into your classroom. On this map, similar types of paperwork are gathered and organized in a central location, which improves your workflow and gives students easy access to all the materials they need.
How do YOU stay organized? Do you use any of these strategies already? Share your favorite tips and tools in the comments below!

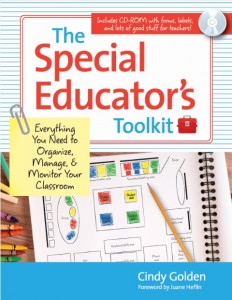
Want more guidance on paperwork organization–including detailed walkthroughs on managing data collection and preparing IEPs? See Cindy Golden’s Special Educator’s Toolkit (it’s got tons of tips for organizing every aspect of your classroom).
Topics
More posts like this
11 Things Supervisors Should Do to Support Instructional Coaches
December 9, 2025
10 Ways to Support Executive Function Skills
October 21, 2025
Write a Comment
Your email address will not be published. Required fields are marked *
Post a Comment